Tuesday, August 20, 2013

How to Jump Start a Car

Whether it's because you left the car lights on, the radio running, the keys in the ignition, or simply because it is old, almost all car owners will face the problem of a dead car battery at some point or another. However, this is an easy problem to solve through jump starting your car, and this article will walk you through how to do just that.

What you'll need:
  • Jump leads/cables
  • Another functional car with the same voltage as your own
  • Safety glasses
The steps:
  1. Park the two cars close enough so that the jumper cable can reach both batteries, and turn both cars off (especially the electrical equipment such as lights and radios).
  2. Make sure your battery isn't corroded, leaking or damaged (do not attempt to jump start if any of these conditions hold true; call a professional). Keep metal objects and flammable items away from the battery, and remove all loose clothing (such as long sleeves or scarves). 
  3. Attach one of the red clips of the jump cable to the positive (+) terminal of the dead battery.
  4. Attach the other red clip to the positive terminal of the good battery.
  5. Attach one of the black clips of the jump cable to the negative (-) terminal of the dead battery.
  6. Attach the other black clip to any unpainted metal surface under the hood of the dead car; this can be as small as a bolt of bracket. Do not attach it to the negative terminal.
  7. Start the working car and let it run for 2-3 minutes to build up the dead battery.
  8. Start the dead car, which should have a working battery now.
  9. Remove the jump cables in the reverse order to the way you connected them. Make sure you do not touch them together or against any metal surfaces.

Voila, you're done! Remember: the hardest part is simply remembering which end of the cable goes where. If your car still doesn't start, you may have a more serious problem than a dead battery and should call your mechanic. 


Tuesday, August 13, 2013

How to Spray Paint Your Car


There are several reasons you might want to spray paint your car yourself, such as to save money or to achieve a personalized look. This article will provide some things you should know – both in preparation and in application – before you are ready to simply grab a can and go for it. The task will take some time, money, and devotion, but if you are prepared with the correct guidelines, your car can achieve the same perfect professional look, even if you do it yourself.

What you will need:
  • Newspaper
  • Large-grain sandpaper or sander
  • Painters tape
  • Car spray paint (using spray gun or aerosol paint)
  • Primer
  • Car wax
  • Safety goggles, dusk mask, disposable gloves, old clothing or overalls
What to do:
  1. Preparation. Warm and dry weather conditions are ideal; if this is not possible, a well-ventilated garage can suffice. Using newspapers and tape, sure the surrounding area is well-covered from any possible overspray (such as the floor).
  2. Sand the car. Use the sandpaper or sander to rub over the surface of the car, since paint won't stick to a slick, shiny surface. Finer sandpaper can be used to remove scratches or corrosion. If there are any holes, you will have to use some putty to repair the damage. Apply a rust treatment product if needed; rusted areas should be sanded down to bare metal to prevent it from spreading. Ensure that the car is fully dried and free of dust, dirt, and debris (completely wash the car if needed); any trace of water will mess up the paint later on.
  3. Primer. Apply the primer to help the paint adhere well and make sure you get an even coat. Spray in thin coats and allow some time for drying in between (about 15-minute intervals). Pay special attention to areas with  bare metal and areas near the door and door handles.
  4. Cover your car. Using painters tape and newspaper, tape off any part of your car that you do not want painted. This may include windows, chrome, bumpers, license plate, mirrors, trim, and tires. 
  5. Paint your car. Put on your safety goggles and gloves. Stand with your spray gun about 10 inches away from the car, and spray using a consistent, even motion from side to side, allowing the paint to slowly build up. Multiple light coats are better than one or two thick ones, which can look uneven, and wait about 20 minutes between each application. You should spray different parts of the car at a time – for example, finish the hood first, then the fender, then a door, et cetera.
  6. Finishing touches. You should finish off the painting with one or two clear coats not only for a glossy, finished look, but also for protection from the sun and natural elements (make sure the car is completely dry between coats). As a final touch, you may want to apply a layer of car wax.
Final tips: Take your time and do not rush or take shortcuts during any part of the process, or you may make a mess. When it comes to spray painting, it is wise to practice on a piece of cardboard or sheet metal first. Remember to use good-quality equipment and products, as well as proper safety equipment.

Thursday, August 8, 2013

How to Prevent Rust Damage

Not only is rust unsightly, unsafe, and undesirable, but it also drastically depreciates your car's resale value. Once it begins to form, it continues to spread and is difficult to remove and repair. Therefore, it is important to know how to prevent it from happening, as well as identify the problem and repair your car when it does.

Rust is iron oxide, the product of corrosion, and consists of natural elements such as salt, water, and heat. Rust usually begins through the chips and nicks that tend to appear in unnoticeable locations on your car from daily driving. Salt (usually from the road during winter months) absorbs water and carries it through these small cracks and abrasions into the metal. With sufficient amount of heat, oxidation causes water to react with metal, producing rust and forming rust holes that eats through metal. The parts of your car that are most susceptible are the wheel wells, fenders, engine, exhaust, and trunk.

The best way to maintain a rust-free car is, of course, stopping rust before it can start. Here are some tips to prevent rust on your car:
  • Cover your car with a plastic covering when not in use, and try to drive further away from other cars to avoid the pebbles that kick up.
  • Wash your car approximately every two to three weeks, or once a week if there is a lot of salt on the roads or if you live near the ocean. Pay special attention to the wheel wells and the underside of your car.
  • Wax your car every four months
  • Keep the interior (especially the rug and upholstery) clean from spills that can start rust from the inside.
  • If you chip the paint of your car and bare metal is exposed, clean promptly and apply touch-up paint.
  • Always protect and keep the metal surface dry if possible.
  • If you are spraying your car with a flammable substance, make sure your engine is cold and give the car some time to dry before turning it on again.
  • If your car is seriously at risk for rust (i.e. very old or regularly exposed to salt), you may consider cleaning and spraying with an appropriate rust-preventing lubricant or repainting.
  • Examine your car frequently for rust. It will show directly on metal surfaces, and will show a small bubble or blister on the painted areas.
Picture courtesy: http://t2.gstatic.com/images?q=tbn:ANd9GcR-pvLIWbkkUc_jBFRFDhkjdav0eIoIs9fkw-6GVIfhHEcqwD7GXA

Tuesday, August 6, 2013

How to Test Drive a New Car

With so many options for car shopping online and so many good deals, it is tempting to simply walk into the dealership and purchase your dream car on the spot. However, buying a car without test driving  it first is like marrying someone without even a first date; no matter how good a car looks and how great of a deal it is and how well received it is by critics, there are still crucial flaws – mechanical, personal, or otherwise – that can be found during the test drive.

Step 1: Do your homework
  • You should do your research and know exactly what models you are potentially interested in before stepping into the dealership; do not let the salesperson talk you into getting a car that is not right for you. Consider what your needs are, what qualities or features you're looking for, and what your price range is. Make a descending list of your "must-haves" and your "preferred/optionals."
Step 2: Get acquainted
  • Bring both your driver's license and insurance with you to the dealership, since they will want to make copies. Be sure to get both back before you leave for the test drive.
  • Bring a friend, family member, or significant other with you for an outside opinion. If the new car is to be a family car, be sure to bring your family as well, so you know how the new car would function with kids in the backseat.
  • Drive your potential candidates back-to-back so you can accurately compare them. 
  • Some tips to determine fit:
    • Comfortable seats?
    • Enough head, hip leg room, both in the front and back seats?
    • Easy entry and exit?
    • Fit, finish, and general build quality?
Step 3: Take it for a spin
  • Take your time. Allow at least half an hour and drive on all kinds of roads, ideally not just the salesperson's predetermined route. Your test drive should match your driving requirements: will you be driving on hills, highways, locally, et cetera?
  • Turn off the stereo so you can pay attention to the sound of the engine and the driving experience.
  • What to look for:
    • The engine should be cold before you start. If it is hot, there may be a starting problem. When driving, it should be quiet and pull smoothly, with no smoke. Listen for unusual noises, especially from the suspension, or excessive wind noise.
    • Steering should be responsive with no vibration, and brakes should be smooth.
    • How is the acceleration and passing acceleration (pay attention to downshifting).
    • Is it capable of climbing hills with relative ease?
    • When cornering, does it hug the road or wallow about?
    • How is the visibility (using the rear and side view mirrors)?
    • Are the controls and instruments easy to reach/use?
    • How is parking - is it easy to parallel park, are there big blind spots, is it easy to maneuver?
Always take the time to reflect on the vehicles and determine which suits you best. Put yourself in control of the test drive. While this level of preparation may not guarantee your absolute perfect car, it is due diligence for a major purchase and one you will certainly not regret.

Picture courtesy: http://www.theautochannel.com/news/2011/07/08/539880-so-cal-ride-and-drive-new-car-show-test-drive.2-lg.jpg

Thursday, August 1, 2013

Using Your Emergency Brakes


When To Use Them
Using the emergency brake outside of a complete brake failure is not recommended. Doing so can damage your emergency brake, rendering it useless in times of a true emergency. Likewise, driving your vehicle with the parking brake engaged can also cause numerous damages to the emergency brake cable, service brake, brake shoes, and even rotors.
For most manual transmission drivers, the parking brake is used persistently. Automatic transmission owners, however, are not always as consistent with their usage of the emergency brake. It is recommended to practice using the emergency brake as a parking brake as often as possible. Whether parking on a flat surface or on a hill, the parking brake should be engaged. But why?

Not Using Your E-Break Can Cause Them To Fail
As odd as this may sound, it is also simple to understand. Although the emergency brake cable is housed in a protected sleeve, infrequent use can result in a build-up of corrosion. As a result, the cable becomes weak over time. As the cable becomes weaker, it is more prone to breaking when put under the stress of a real emergency situation. Normal use prevents this build-up and keeps the cable in good condition.

How To Use Them
If you are ever in the situation where your hydraulic brakes fail and you must use the emergency brake, be sure to use it properly. If the brake is pulled too quickly, it will cause the brakes to lock up quickly and the car will fishtail or skid, thus removing your removing your control over the vehicle. If you do have to use the emergency brake, be sure to pull it up slowly and steadily. This will bring the car to a safe and controlled stop.
Remember to use safe roadside practices in the event of a roadside emergency. Occasional check-ups on your car's emergency brake can help prevent or notify you of any wear and tear it might have.

Picture courtesy: http://image.motortrend.com/f/34229022+w786+ar1/2010-nissan-sentra-SE-R-emergency-brake.jpg

Tuesday, July 30, 2013

How to Save Money on Car Repairs


Owning a car can be expensive, and many car owners are filled with dread when they see the "check engine" light starting to flash. That warning usually means a trip to the car repair shop and spending a hefty sum, but here are some tips to help you save money on maintenance and repairs. If you are knowledgable about the process, you will certainly feel better about taking your car to the mechanic and confident that you are receiving the best value for your efforts.

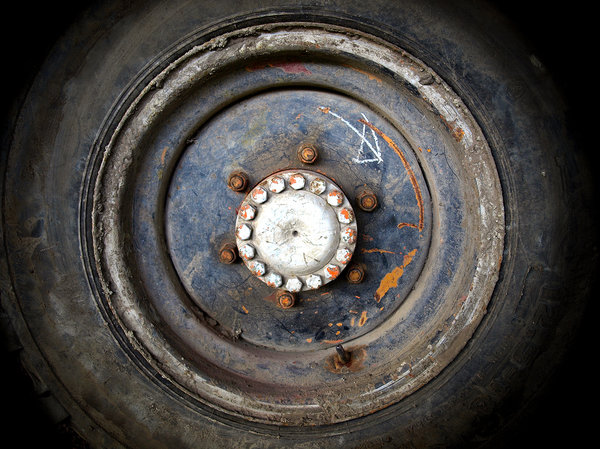
1. Preventative mechanics.
An old adage says, "an ounce of prevention is worth a pound of cure." The same holds true for cars, and regular maintenance can ensure the safetyreliabilitydrivabilitycomfort and longevity of a car. Follow your owner's manual for all the recommended scheduled maintenance of your car; understand that each car has different needs, based on the number of trips/distance it is driven per day, climate conditions, nature of the roads, et cetera. While this may seem like a hassle, it will save you a lot of money by adding years of life to your car, helping you avoid big costly repairs in the long run. Some common maintenance measures include car washes, tire rotations, checking/replacing a number of parts (i.e. timing belts, engine oil, fuel filters, windshield wipers, battery terminals, coolants). Be sure to avoid common car maintenance mistakes - you can check out this article to learn more!

2. Find the right price.
If you are faced with an expensive repair, it is worth it to shop around for multiple estimates and quotes. This way, you will not only find one that is most cost-effective, but you will also gain more accurate idea of the general pricing of your repair. You should also browse online and know the usual charges for car repairs in your area; websites such as AutoMD and RepairPal can be a great resource. Know that all warranties are different, and review your own to see if any repair costs are covered. Also, before the warranty expires, have the car inspected and have any qualifying repairs performed.


3. Find the right mechanic.
The best way to find a great mechanic and price is through referrals from friends/family/coworkers and through Yelp reviews. A good repair shop should have certified technicians on staff, with certifications by ASE in one or more classifications (brakes, engines, steering/suspension, et cetera). You should also check the work area for a relatively clean floor, since a shop that has dirty shop rags, empty fluid containers, and other trash tends to imply sloppy mechanics. Note that getting repairs done at a dealership may be more expensive, but you can be 100% confident that all repairs will be done correctly. Thus, you might want to take your car to a dealership for more complex repairs.

4. Diagnose problems and (potentially) do it yourself.
If your car is not running properly, diagnose the problem yourself before going straight to a mechanic. Certain tasks (such as changing the wiper blade or air filter) can be done independently, even for those who are not mechanically inclined. If anything, one way to save money is to cut out the middleman and purchase your own parts to bring to the shop for installation.

Picture courtesy: http://t2.gstatic.com/images?q=tbn:ANd9GcRgkg1OPGSa-iPjDffwBrTgxDdqz8ONgChs85WILWTwWpzcSB6n

Tuesday, July 23, 2013

How to Identify Reckless Driving


In the U.S. alone there are over 40,000 people killed every year on county, state and the interstate highways... and many of those deaths are directly the result of reckless drivers. In a 2003 driving poll conducted by The National Safe Driving Test, 91% of all drivers admitted to engaging in risky driving behavior over a six-month span.There is a variety of actions that can help identify a dangerous or reckless driver, and being knowledgeable and aware could increase the level of safety of the road, both for yourself and others.


  • Rolling through stop signs. A lot of people don't come to a complete stop; they slow down, check for oncoming traffic, and then keep on going. However, know that the sign is there for a reason, and the only way to be 110% sure that there is no traffic is by coming to a complete stop.
  • Driving too quickly. Speeding is responsible for 30% of all fatal crashes.
  • Failing to keep up with traffic. Some people think that slower means safer, but drivers expect you to keep up with the flow of traffic. If you're going too slowly relative to everyone else, people behind you will try to pass you, which can easily lead to an accident. 
  • Tailgating. The average car needs 120-160 feet to come to a complete stop. You should maintain that safe distance away from the car ahead of you, or even farther if you're driving at higher speeds. Change lanes when it is safe if you're the one being tailgated.
  • Running yellow lights. Yellow means slow down. The red light comes shortly after; if you speed up at the yellow light, there is always a chance of accident.
  • Not checking blind spots. People who get in accidents often say that the opposing car "came out of nowhere." However, that is only because the other car was in a blind spot. Always check your blind spots to be aware of your surroundings.
  • Not wearing driving glasses. If you need prescribed glasses, wear them. Have sunglasses nearby just in case you need protection from the sun and the visor isn't enough; squinting doesn't help, and you might miss something.
  • Not using signals. Using signals alerts drivers to your presence and intents, so that you can safely change lanes. Not doing so may catch other drivers off-guard and cause them to lose their focus on the road.
  • Giving in to road rage. Driver aggression can be caused by a variety of factors and is extremely dangerous, causing drivers to drive with emotion rather than logic and reason. Always drive with a level head and keep your focus - for tips, check out this article, The Zen of Driving.
  • Lack of etiquette. Always be conscious and courteous of other drivers. Especially when it comes to merging and lane changes, it is best to be polite and give the other car right of way.
  • Multitasking. Anything from talking to your passengers to using electronic devices to eating to listening to music can distract the driver from the road. While it is certainly possible to drive and do something else at the same time, it is less safe to divide your focus in such a manner; always give your 100% attention to the road.
If you see someone driving recklessly - whether it be from texting, drunk/drowsy driving, being overly aggressive, or otherwise careless driving - report it by calling 911, but only call if you feel it's a dangerous situation. Simple motor violations do not warrant reporting; being a danger and placing civilians in harm's way, on the other hand, is.

Tuesday, July 9, 2013

Driving Safely with your Dog

While we love our dogs and want them with us all the time, or just want to take them out for a cruise, it is important to transport them in a proper manner that is safe not only for the driver and the dog, but also for other drivers on the road. Many drivers simply have their pets sit in the backseat, or even in the back of pickup trucks or in their laps. Here are some pet travel tips that can keep everyone, including your dog, safe and happy:
  • Safely secure your dog while driving, either with a fitted pet travel harness, pet car seat, seatbelt, or properly secured crate. Never attach a restraining device to the collar. 
    • Never let your car near your lap, since s/he can interfere with steering, block the driver's vision, or accidentally manipulate the accelerator, the brakes, and gear shifts. S/he can also become a safety hazard if the driver has to divert attention from the road to deal with the dog's behavior.
  • Do not allow your dog to ride with its head hanging outside the window.Airborne debris can get into the eyes, ears, and mouth, and obstacles close to the car and potentially strike the head, causing injury or death.
    • Unsecured dogs can be thrown out at high speeds if the car stops abruptly or gets into an accident.
  • Never leave your pet alone in a parked car. Temperatures in confined spaces can reach over 100 degrees and cause heatstroke or even death during the summer time, and extreme cold temperatures in the winter can be just as threatening.
  • Have your pet consume small amounts of food and water prior to the ride, but not too much due to digesting and urinary issues that may arise.
Picture courtesy: http://www.farmersalmanac.com/wp-content/uploads/2012/05/driving-dog-thumb-420x240.jpg

Thursday, July 4, 2013

Dangers of Old Tires

There is little quality control in the used car industry, and just because a tire looks like it is in perfect shape does not mean it's safe. Many people rely on the tread depth to determine its condition, but a tire could look completely brand-new, have never been used, and have never touched the ground, but be over-aged to the point where the rubber compounds cannot support the weight of your car. 

What happens as a car ages?
  • Rubber compounds oxidizes, causing cracks in the rubber develop over time. The internal adhesive bonds between the various layers of the tire begin to break down, and the steels belts in the tread may separate from the rest of the tire.
  • The tire becomes worn and more susceptible to malfunction or puncture.
What are the dangers of old tires?
  • Function. Old tires have a worn-out tread, causing reduced traction on the road and requiring a longer stopping distance.
  • Storage. The conditions of storage for spare tires can deteriorate the tires. Mounting the spare tire underneath or behind the vehicle exposes it to dirt and other elements, while storing in the trunk is comparable to baking it in a miniature oven. 
  • Blown tires. An old tire has a higher chance of puncture or completely blowing out, which can cause loss of vehicle control.
  • Temperature and weather. Worn tires can be especially dangerous during times of bad weather, such as rainstorms, since the reduced grip can cause sliding or hydroplaning. Warmer/coastal climates and exposure to sunlight can hasten the aging process.
  • Use. The duration of the tires can depend on the nature of its use. Rapid braking and acceleration, road conditions, bumping into curbs, and irregular maintenance can contribute to decline in quality.
How can I determine the age of my tires?
  • All tires are stamped at the factory with a Department of Transportation (DOT) code with 11-14 digits on the sidewall. For the last four digits, the first two represents the week of manufacture and the last two represents the year. Even when you are buying new cars, you should check the date to ensure that the tires were not stored in a warehouse for a long time prior to delivery. If it was manufactured more than 6 months earlier, consider asking for newer tires, since tires are still subject to oxidation even when not in use.
All in all, while it may be tempting to save money by equipping your vehicle with your old or used tires, consider the risks. Driving on unsafe tires can lead to serious accidents, and you should never take a chance when it comes to your vehicle or, more importantly, your own safety.

Picture courtesy: http://l.rgbimg.com/cache1n8lEo/users/j/ja/jazza/600/2djsV4n.jpg

Tuesday, July 2, 2013

How to Remove Bumper Stickers


Bumper stickers are a common accessory to our cars. They can be clever, encouraging, negative, or make a statement. However, they are often very difficult to remove from your car. It is important to remember that they are super stickers that have bonded to the paint on your car.

Here are a few techniques to get those pesky bumper stickers off your car.
  • Boiling Water: pour hot water over the bumper sticker to head up the adhesive and try to peel slowly from the corners.
  • Chemicals: There are multiple chemical solutions to remove bumper stickers
    • Vinegar:Take a cloth soaked in vinegar and place over the sticker for 3-5 minutes. Then peel.
    • Solution: Take some rubbing alcohol and dish soap and soak the sticker for 10 minutes.
    • WD-40: If you have an corner that you can peel back from the sticker, try to lubricate the area underneath with some WD-40. Continue to apply the lubricant as your peel back the sticker. This should help in breaking the seal of the sticker.
  • Blow Dryer: Heat the sticker for 30 seconds or more. Avoid high heat, as this will damage your paint.

Bumper stickers can be a fun way to make a statement with your car. However, the best way to to prevent damage to your car is to avoid bumper stickers altogether. The longer a sticker is left on, the harder it is to remove and the more likely it is to cause permanent damage to your car's paint job.

Avoid:
  • Very caustic or acidic chemicals: these will damage the paint of your car
  • Peeling the sticker straight up. Make sure that when you are peeling the sticker off, pull the sticker back on itself and pull at an angle.
  • Very high heat. While heat is good at loosening the adhesive, it can also cause damage to your paint.
  • Razor blades. Yes, it is tempting to grab a razor blade to scrape off the sticker and the little bits it leave behind, however, your paint can easily be scratched by the sharp blade.   


    Picture courtesy: https://i.chzbgr.com/maxW500/6394720256/h179D18F9/